One way to overcome this issue, however, is to wrap text in Excel. This pushes the text onto another line, increasing the cell size without overlapping with other cells. There are a few ways you can do this, from using the Wrap Text tool to adding a manual line break. If you want to know how to wrap text in Excel, here’s what you’ll need to do.
How Text Wrapping Works in Microsoft Excel
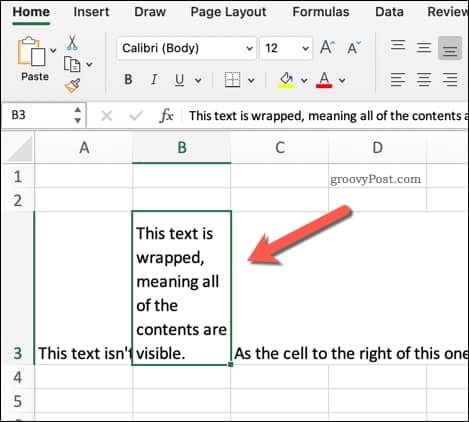
There are three ways that a cell containing a text string can appear in Excel. If the text isn’t wrapped, the contents of the cell will become hidden as soon as the cell border is reached. If it is wrapped, Excel will break the line, pushing the text onto another line and increasing the height of the cell itself. However, if the cells to the right of your initial cell are empty, Excel will automatically display the full contents of your initial cell. If you add data to any other cells that this initial cell overlaps with, however, the cell value will become hidden again.
If you want to change this, you’ll need to wrap your text. You can do this using the Wrap Text tool or by adding line breaks manually.
How to Wrap Text in Excel Using the Wrap Text Tool
The Wrap Text tool is the easiest way to add text wrapping to a cell in Excel. To do this, open your Excel workbook and select the cell (or cells) that you wish to format. These can be cells that have hidden text values or that current overlap with other empty cells. Once the cells are selected, press the Home tab on the ribbon bar, then press the Wrap Text button. These steps should work for both Windows and Mac users.
Excel will automatically shift your cell’s text to fill the cell, increasing the height of the cell in the process. It will not change your column width, however.
You can disable this at any point by selecting your cell and pressing Home > Wrap Text again. This will return your text wrapping to normal.
Adding a Manual Line Break to Cells
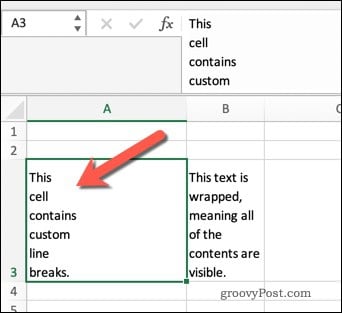
Another way to quickly wrap your text without using the Wrap Text tool is to use a line break. Line breaks, as the name suggests, breaks up a text string by pushing some of the text onto another line. You may decide to do this if you want to split up a text string at certain points, rather than when the cell border is reached. To do this, double-click on the cell you wish to edit, then place your blinking cursor at the point where you wish to add the line break. Alternatively, select the cell, then place the blinking cursor in the same position using the formula bar.
Once the cursor is in position, press the Alt + Enter keys on your keyboard. If you’re on Mac, press Control + Option + Enter instead. This will push any text after the line break onto a new line.
If you want to remove a line break, simply place the blinking cursor after it, then press the Backspace key.
Formatting an Excel Workbook
Wrapping text in Excel is just one way you can format your Excel workbooks to better present your data. For instance, you can freeze or group together rows and columns to make it easier to work through large datasets. If you want to change how your data is presented, you could even transpose your data. This allows you to switch your columns to rows (and vice versa). You could also use conditional formatting in Excel as a way to highlight certain values and figures, especially if you’re working with rapidly changing data. Comment Name * Email *
Δ Save my name and email and send me emails as new comments are made to this post.


![]()
